Unlike applications that are built with php or javascript, python web applications require a bit of setup to get the applications up and running.
There are multiple platforms available that provides a free hosting platform for python applications. Few of them are heroku and digial ocean. But recently, I stumbled upon pythonanywhere.com which I found really interesting as its tag line suggests, Host, run, and code Python in the cloud!
What is pythonanywhere??
pythonanywhere provides a full-fleged python environment. All the python versions comes pre-installed. The quickstart installers offers support for Django, web2py, Flask, and Bottle where minimalisitic setup is required to get the application running!
Here I will show to deploy a django web application on pythonanywhere. So lets get started!!
Register an account with pythonanywhere. Its free!!
Under the free account, the user can setup only one web app. To elevate the offerings, the user will be required to upgrade to premium.
This is how the dashboard looks like
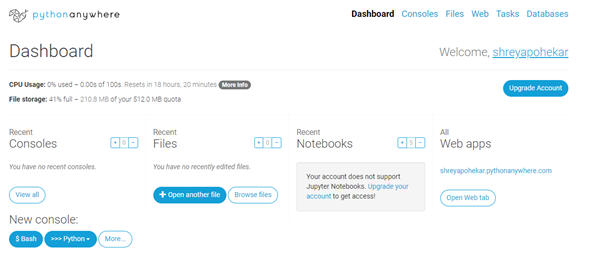
You can go into the console section to open a new bash or a python console. All the files present in your project can be visually viewed under the Files section. Under web section, we need to do the actual work of defining the settings for the application. In the bottom right of the image, there is a webapp listed with our username followed by the pythonanywhere.com. You can also add your custom domain but that requires upgrade to premium.
Clone the repo
- Open a new console and clone the repository from the github. I will clone my repository for this demonstration. https://github.com/shreyapohekar/djcommerce.git
# git clone https://github.com/shreyapohekar/djcommerce.git
When we have our django project cloned, a virtual environment has to be created. It can be created using mkvirtualenv
```nix
08:07 ~ $ pwd
/home/shreyapohekar

08:07 ~ $ mkvirtualenv --python=/usr/bin/python3.7.5 myenv
The path /usr/bin/python3.7.5 (from --python=/usr/bin/python3.7.5) does not exist
08:11 ~ $ mkvirtualenv --python=/usr/bin/python3.7 myenv
Running virtualenv with interpreter /usr/bin/python3.7
Already using interpreter /usr/bin/python3.7
Using base prefix '/usr'
New python executable in /home/shreyapohekar/.virtualenvs/myenv/bin/python3.7
Also creating executable in /home/shreyapohekar/.virtualenvs/myenv/bin/python
Installing setuptools, pip, wheel...
done.
virtualenvwrapper.user_scripts creating /home/shreyapohekar/.virtualenvs/myenv/bin/predeactivate
virtualenvwrapper.user_scripts creating /home/shreyapohekar/.virtualenvs/myenv/bin/postdeactivate
virtualenvwrapper.user_scripts creating /home/shreyapohekar/.virtualenvs/myenv/bin/preactivate
virtualenvwrapper.user_scripts creating /home/shreyapohekar/.virtualenvs/myenv/bin/postactivate
virtualenvwrapper.user_scripts creating /home/shreyapohekar/.virtualenvs/myenv/bin/get_env_details
```
Once the virtual environment is created, install django with pip. You can ignore this step if you already have it listed in the requirements.txt
# pip install django
Now install the requirements.txt
Installing the requirements.txt
(myenv) 08:19 ~ $ cd djecommerce/
(myenv) 08:19 ~/djecommerce (master)$ pwd
/home/shreyapohekar/djecommerce
(myenv) 08:19 ~/djecommerce (master)$ pip install -r requirements.txt
After installing all the modules, migrate command of manage.py can be used to create tables
(myenv) 08:24 ~/djecommerce (master)$ python manage.py migrate
Operations to perform:
  Apply all migrations: account, admin, auth, contenttypes, core, sessions, sites, socialaccount
Running migrations:
  Applying contenttypes.0001_initial... OK
  Applying auth.0001_initial... OK
  Applying account.0001_initial... OK
  Applying account.0002_email_max_length... OK
  Applying admin.0001_initial... OK
  Applying admin.0002_logentry_remove_auto_add... OK
  Applying admin.0003_logentry_add_action_flag_choices... OK
  Applying contenttypes.0002_remove_content_type_name... OK
  Applying auth.0002_alter_permission_name_max_length... OK
  Applying auth.0003_alter_user_email_max_length... OK
  Applying auth.0004_alter_user_username_opts... OK
  Applying auth.0005_alter_user_last_login_null... OK
  Applying auth.0006_require_contenttypes_0002... OK
  Applying auth.0007_alter_validators_add_error_messages... OK
  Applying auth.0008_alter_user_username_max_length... OK
  Applying auth.0009_alter_user_last_name_max_length... OK
  Applying auth.0010_alter_group_name_max_length... OK
  Applying auth.0011_update_proxy_permissions... OK
  Applying core.0001_initial... OK
  Applying core.0002_auto_20200810_1649... OK
  Applying core.0003_auto_20200811_0659... OK
  Applying core.0004_userprofile... OK
  Applying sessions.0001_initial... OK
  Applying sites.0001_initial... OK
  Applying sites.0002_alter_domain_unique... OK
  Applying socialaccount.0001_initial... OK
  Applying socialaccount.0002_token_max_lengths... OK
  Applying socialaccount.0003_extra_data_default_dict... OK
After creating the tables, We will create a web app.
Creating a web app
In the dashboard, there was an option for web in the navbar. Click that.
- It creates a new domain name as username.pythonanywhere.com. Click next
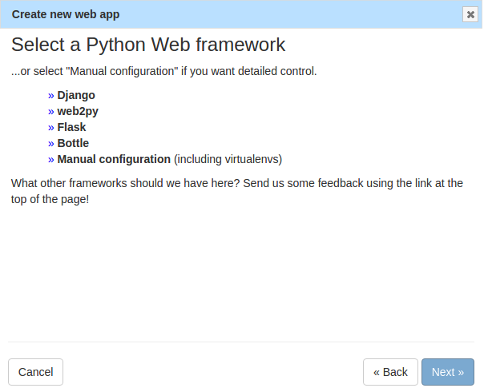
- Now we need to select the framework. Although you can select Django here. but I will select manual configuration to show how everything works.
- In the next step, you will have to select the version of python that you used for your project. Mine was python3.7. Click next
- Again click next for the path, keeping it default.
This creates your web app but a bit of configuration needs to be done!
Configuration
Following above steps, creates a webapp. Let’s configure.
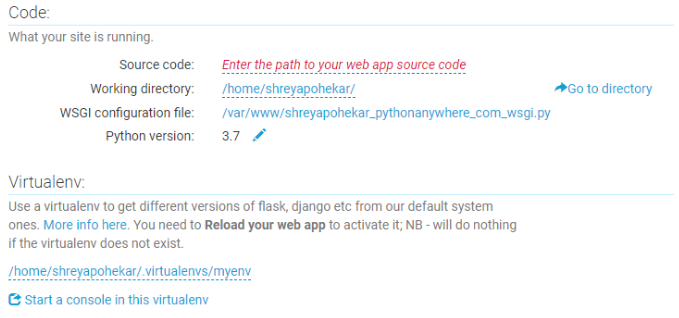
Scroll down to the section of code and check your working directory and WSGI configuration file.
Next, under virtualenv, enter the name of the virtual environment that you created. Mine was myenv. Click the tick mark and it will automatically take the path.
Now click the WSGI configuration file in code section. You will see a file with a lot of comments. Actually, these are settings for all the frameworks. The reason being that we opted for manual configuration.
Remove everything apart from django setting code. It should look something like this. Make sure you uncomment the lines have single # only.
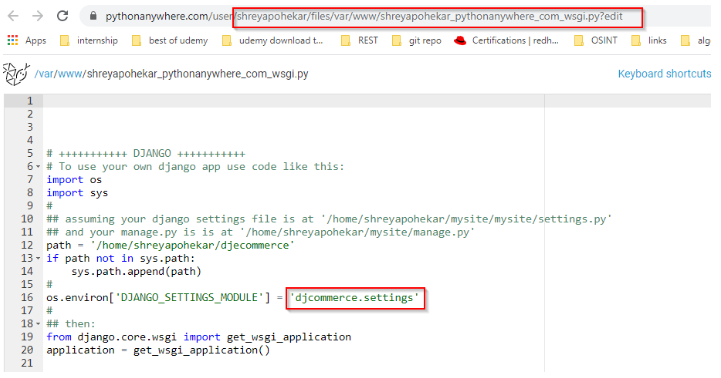
Change the path to the name of the folder that got cloned in your working directory. Also, change the DJANGO_SETTINGS_MODULE to the name of the project that you might have created. Mine was djcommerce.settings. Make sure that you save the file and exit.
Now under the dashboard, got to the files section in navbar. The directory structure of your project will be displayed.
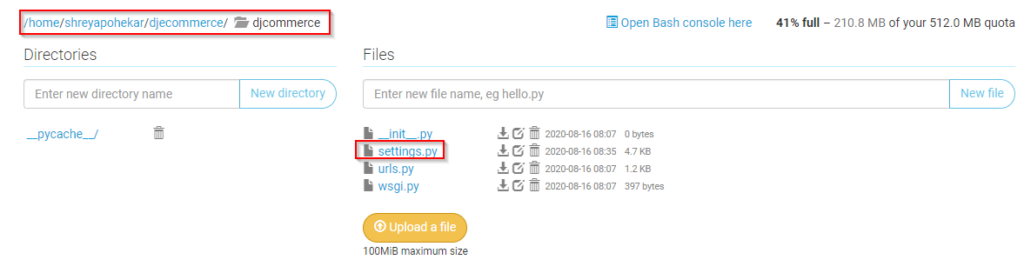
Note the contents of settings.py
Open settings.py in a new tab and add the following lines.
STATIC_URL = '/static/'
STATIC_ROOT = '/home/shreyapohekar/djecommerce/static'
STATICFILES_DIRS = (os.path.join(os.path.dirname(file), '../static_in_env/'),)
MEDIA_URL = '/media/'
MEDIA_ROOT = ''
EMAIL_BACKEND = 'django.core.mail.backends.console.EmailBackend'
The folder where all the static files will be collected is named static ( present under the root of the project. Also, STATICFILES_DIRS is defined to tell django that static files can be loaded from static_in_env folder as well. But wait!!! static folder is not present in my directory structure.
For that, the collectstatic command has to be run that collects all the static files from the project and stores in the static folder that is created automatically.
# python manage.py collectstatic

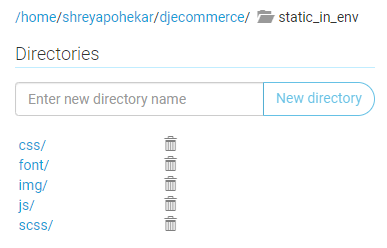
You see the difference between the above 2 images? These extra folders are present in static because the UI for admin panel is handled in those (that is by default present in django)
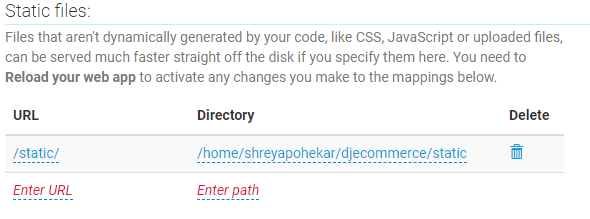
Adding the static files settings
Once again, go to the web section in navbar and scroll down to static files section. And it should look something like this.
Make sure that you reload the app to apply all the changes
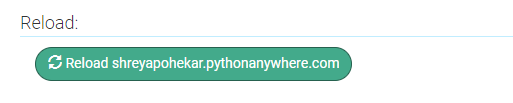
And, your are all set to launch your application that is deployed over cloud.
That’s all for this blog post. Hope you all enjoyed reading it and the content solved your purpose. Do like and share!!
See you in the next one 🙂 Until then, happy learning!!